Dollar Store Vase Makeover

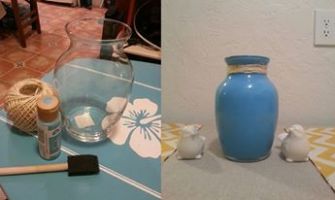
I see all kinds of posts with hand painted vases and I wanted to give it a try.  I have to admit it was my second attempt that turned out good, but I’ll give you guys some good tips so you don’t make the same mistakes I did!  In the end though, I’m very happy with how it turned out.

Image

Supplies:

  • Glass Vase $1 (Dollar Tree)
  • Sisal Twine $1 (Dollar Tree)

Total Cost: $2

Supplies already on hand:

  • Blue Acrylic Paint (Originally around $2)
  • Sponge Brush (Originally $1)
  • Super Glue

Step 1: Paint the vase by pouring paint inside.  Start from the bottom and use the sponge brush to gently drag the paint over the glass, leaving a thick coat.  Don’t use a lot of pressure with the brush, you don’t want to paint the vase, as much as just spread the paint around.  It took me about 1/3 – 1/2 of the bottle of paint and I did about 2 coats and some touch ups.  When you get to the rim of the vase, don’t worry about perfection.  Once you get the paint on, you can go back with some cotton balls dipped in water or nail polish remover, and clean up the paint around the edge.

Step 2: Wrap the twine around the vase in your preferred location.  Originally, I wanted to hot glue the twine around the inside lip of the vase and down the front to the thinnest point of the vase’s neck. That did just not work for me.  The twine was difficult to work with, the hot glue looked terrible and I was not happy.  So I ended up ripping that off, which ripped off a big chunk of paint, which required me to go back and paint again.  I ended up just wrapping it like you can see in the picture and tying the ends of the twine in a bow, so it is not attached to the glass at all.  I think I will probably end up dabbing a little bit of super glue on and securing the ends to the vase so that it doesn’t get loose and doesn’t look twisted.

Another helpful tip:  Originally I planned on spray painting the vase.  I find spray paint fun and easy.  Well I can tell you that that was a mistake.  Even though the paint was made to adhere to glass it was uneven and unattractive.  It also started to crack after a couple days and just looked terrible.  So I suggest sticking to acrylic paint from the inside.

The only thing I’m not entirely happy about is that from the top, looking down the paint looks uneven inside the lip of the vase.  Which is why originally I wanted to twine wrap the entire top.  But I’m not sure what to do about that.  Maybe I’m just not good enough with a paint brush haha.
Posted in Home Decor | Tagged , , , , , , , , , , | Leave a comment

Hand Painted Chevron Clutch Purse

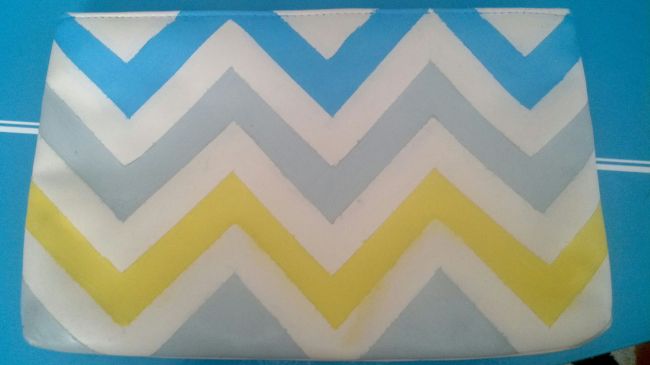
I love chevrons, as you may well know, and I also happen to love purses. Clutches are great when you only need a few items for the evening, so I decided to make this fun clutch in my favorite color combo: aqua, gray and yellow!  Check out the before and after.

ImageSupplies:

  • White Clutch: $1.60 from a thrift store!
  • FolkArt Acrylic Paints (Dove Gray, Lemon Custard and Coastal Blue): $6
  • FolkArt Acrylic Textile Medium: $3
  • FolkArt Artists Varnish Gloss: $5
  • Foam Paint Brushes (4 Pack): $1
  • Painter’s Tape: $5.29

Total Cost: $21.89

Supplies Already on Hand:

  • Nail polish remover
  • Cotton Balls
  • Cotton Swabs

ImageStep 1: Clean the clutch.  If you go the route I did and upcycle a thrift store clutch, chances are it will need a good cleaning.  Soap and water would probably work just fine, but I started with some nail polish removed on cotton balls to really get those stains out.  Then let it dry completely before beginning.

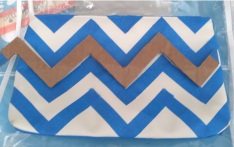
Step 2: Tape off your pattern.  I chose this cute chevron pattern and made the stripes 1″ wide, the width of my tape and of my brushes.  I found it easiest to make a pattern out of cardboard in order to get the lines even and straight.  I used an old plastic bag that my bedding came in to protect my pretty painted surfboard inspired table!

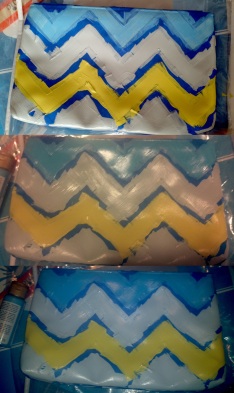
1, 2, 3 Coats of Paint

1, 2, 3 Coats of Paint

Step 3: Paint, paint, paint.  It’s important to mix your acrylic with a fabric medium so that it will be flexible enough for the purse.  The brand I used suggested a 2:1 ratio.  After mixing, I painted on the layers with the foam brushes I got.  I did 3 layers, waiting one hour in between each coat.  Pretty simple and fun.

Step 4: Remove the tape.  Take it slow and careful and make sure your paint is fully dry.  I waited 24 hours before removing the tape.  The paint still had a tacky feel to it and my lines didn’t come out perfect, so I took a cotton swab, dipped it in nail polish remover and cleaned up the lines.  I also had to touch up one spot of paint.

Step 5: Varnish.  The varnish helps protect it from physical damage and sun bleaching.  It also gives it a glossy look and leaves no tackiness.  It’s not perfect, but I’m pretty happy with the final product.

Image

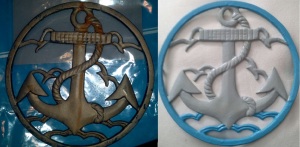
$21.89 might seem like a lot to start a project (for a cheapo like me anyways) however, there is a ton of paint left over for other projects.  Like this trivet I painted that I thrifted for under $3.

hand painted trivet before and after

Posted in Clothing and Accessories | Tagged , , , , , , , , , , , , , , , | Leave a comment

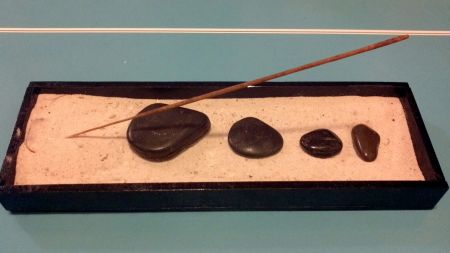
Zen Rock Garden Incense Holder

I love the smell of incense and ever since I found an awesome incense vendor at the Wagon Wheel flea market (selling it for 20 sticks per dollar) I have accumulated a large quantity.  I bought a cheap $1 orange incense holder from him, but wanted something a little more fun.  I’ve also always wanted a little mini zen rock garden, so I decided to combine the ideas into one.

Zen Rock Garden Incense Holder

Supplies:

  • 2 Sheets of 6″X.25″X12″ Plywood $6
  • Decorative River Rocks $4
  • Incense Holder $1

Total Cost: $11

Supplies already on hand:

  • Super Glue
  • Black Enamel Spray Paint
  • Jigsaw
  • Sand (fresh from the beach!)

Step One: Measure, cut and glue the plywood.  Okay, that’s kind of like 3 steps, but this project is really easy.  No need for me to over-complicate things.  I used one full sheet as the bottom for the box, then used a pen to mark where to cut the other pieces for the sides.  Two long and two short pieces about 1 inch tall did the trick.  The hardest part was gluing the plywood together. My glue was not instant and I kept moving and messing it up while it was drying.

Step Two: Paint the holder.  I chose a black gloss enamel for a polished look.  Two coats and it was looking great.

Step Three: Fill it up.  I bought an incense holder from the dollar store for $1.  I put it at the bottom of the bigger zen holder and covered it with sand, which I got from the beach down the street.  Then I aligned the rocks, placed a stick of incense and ended up with an awesome new holder!

Posted in Home Decor | Tagged , , , , , , , , | 2 Comments

Boring Ikea Bed Makeover

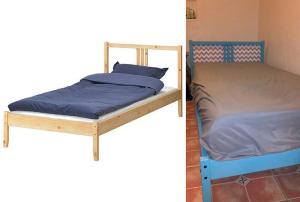
When I moved a couple months ago I was in need of a new bed that wasn’t quite a bulky as my old monstrosity of a bed.  I searched craigslist for cheap options but came up with nothing and finally found an Ikea bed that was just waiting to be made awesome.  Check out this before and after picture.  (I left off the bedding so you can really see the headboard.)

Before and After Ikea Bed Makeover

Supplies for this project:

  • IKEA FJELLSE Bed Frame $40
  • 2 Cans Spray Primer $8
  • 2 Cans Krylon Island Splash Spray Paint $8
  • Printed Chevron Canvas FREE!

Supplies on hand:

  • Staple Gun with Staples
  • Screwdriver
  • Masking Tape

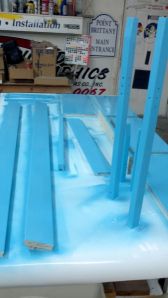
Painted Bed PiecesDespite being such a large project it was actually pretty simple.  Since the IKEA beds come in boxes you don’t have to disassemble to paint.  I didn’t even have to sand the bed.  The unfinished wood was ready for painting.  I just put on two coats of spray primer.  I was also working on trying to paint a bookcase at the same time.  You can see how that bookcase turned out on another post.  So you might be able to cover the bed in one can of primer, I don’t know.  And then an additional 2-3 coats of the Island Splash blue that I also used to paint my awesome surfboard inspired coffee table.  I only bothered painting what would be visible to save on time and money.  One mistake I did make was painting the wrong end of the shorter legs.  So the bottom part is painted but the part you see is still white.  Then I took the bed pieces from the workshop to my apartment and assembled.

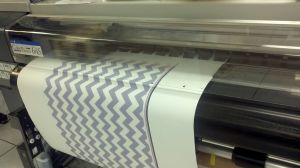
Canvas being printedI had my parents, who own a sign and graphics company, print me the chevron pattern on canvas.  Forunately for me, they haven’t charged me for any work they’ve done for me (and it’s been quite a lot!)  You could have a sign company print something like this for you, or find some fabric with a pattern you like to use.


Stapling the Canvas to the BedThen I simply used some masking tape to hold the canvas in place and then used the staple gun to attach it.  I’ve never used a staple gun before but after getting over being intimidated, it was kinda fun actually.
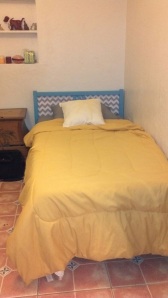
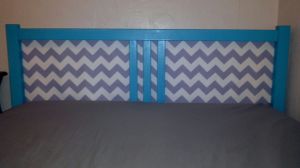
 

And then voila!  A super cute bed is complete.

Completed Bed

Here’s a close up of the pretty headboard.

Completed Headboard

Posted in Custom Furniture Pieces | Tagged , , , , , , , , , , , , , , , | Leave a comment

Thrifty Thursday: Jewelry Boxes

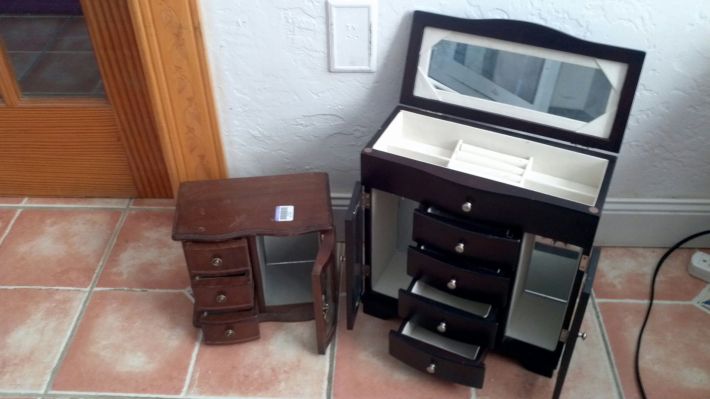
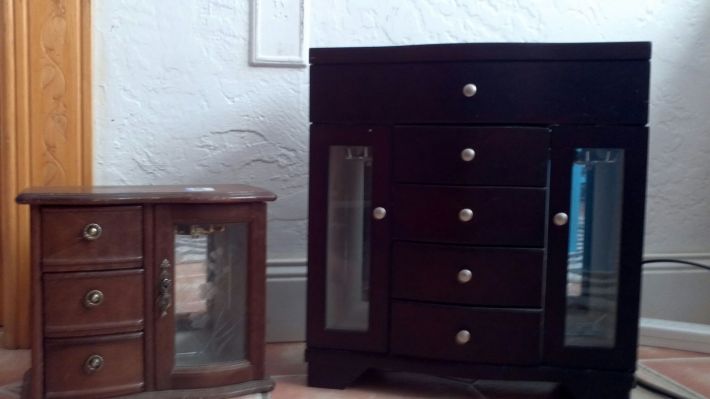
I am in love with these new thrift store finds I got today! 

Image

Image

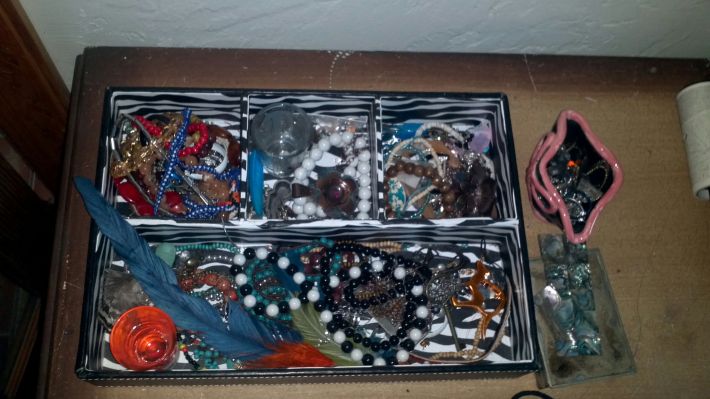
I got them both from Goodwill for under $10.  I’m thinking some sanding, new paint and a good glass and mirror cleaning and they could be really nice.  I might even keep one, since my current jewelry organization isn’t really working out for me…

Image

Posted in Thrifty Thursday | Tagged , , | Leave a comment

Custom Bookcase Creation: A Project with Many Lessons Learned

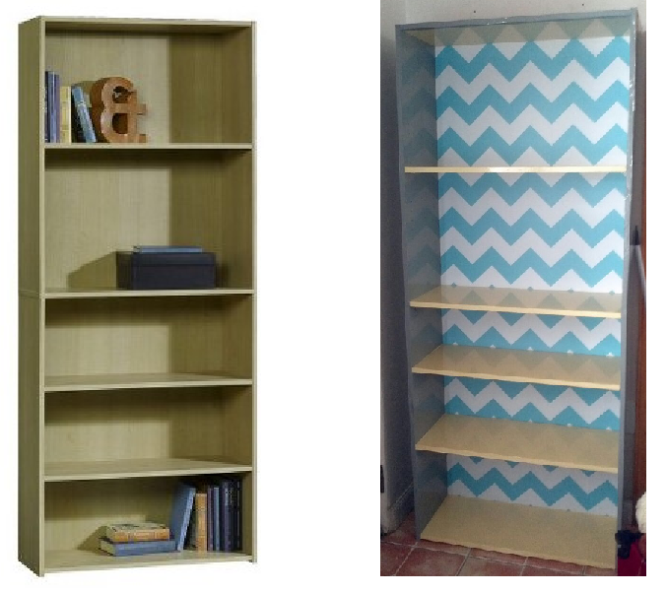
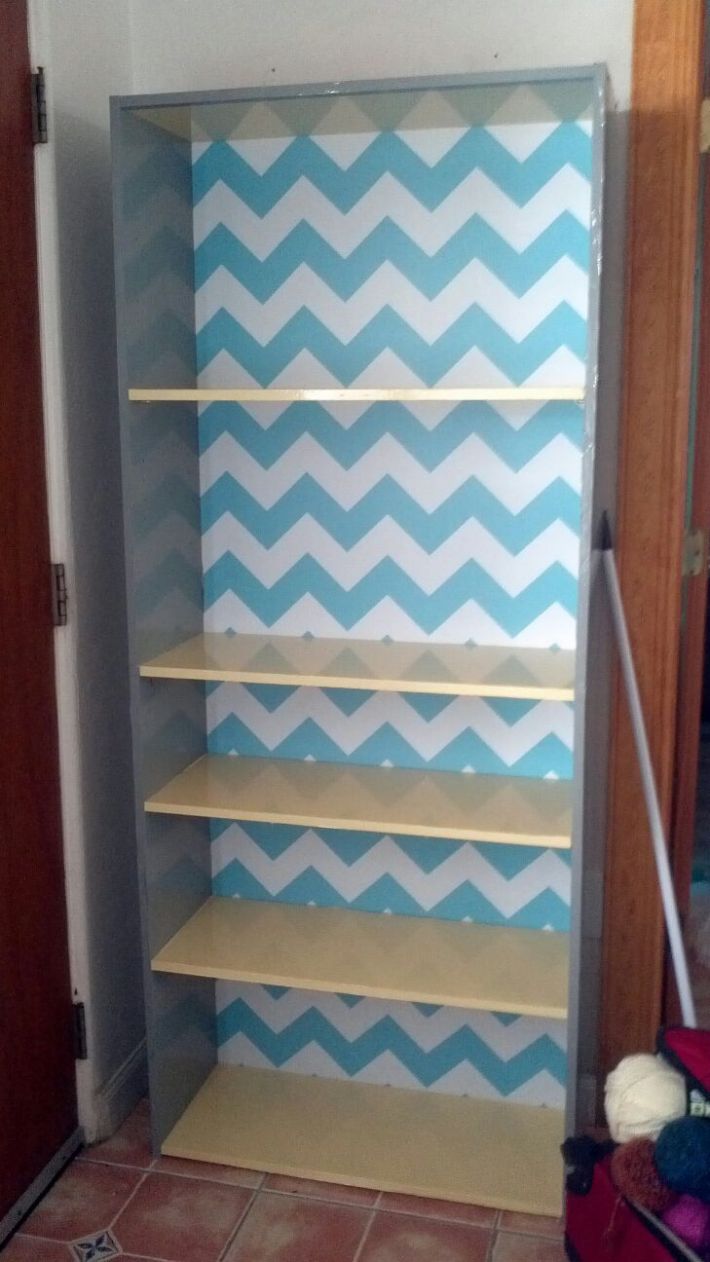
First off, I am going to forewarn you that this is going to be a long post.  Why?  Because I failed…multiple times.  I wasted a LOT of time and money, but hopefully by telling you my  errors, you can avoid them if you wish to attempt a similar project.  So here is a before and after of my completed project:

Image

I bought the maple bookcase from Target for $30 and originally intended to paint it the same blue as my surfboard inspired coffee table and have a gray and white chevron background.  I ended up with a gray bookcase, with yellow shelved and an aqua and white chevron background.  I am happy with the finished product, but boy did I make a lot of mistakes and learn a lot of lessons in the process.

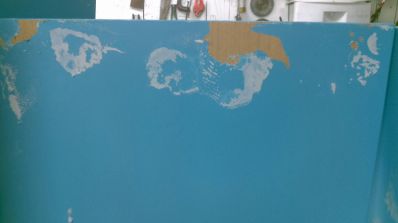
My first attempt was to spray primer and paint the bookcase with the same paint I used to

Imagedo the coffee table.  It is made to stick to plastic, wood, and a wide array of materials and I didn’t have a problem painting the wood veneer on the coffee table so I thought it would be just fine.  Boy was I wrong.  A light sanding like I did on the coffee table didn’t hardly scratch the surface of the bookcase’s veneer.  And the primer and paint would rub right off even after they had had proper time to dry.  I was left with the mess you see in the image.  In hindsight I think if I had used some sort of power sander to rough up the veneer first it would have stuck, but I can’t be sure.  So don’t assume that paint made to stick to the slickest of substances will stick to your veneer.

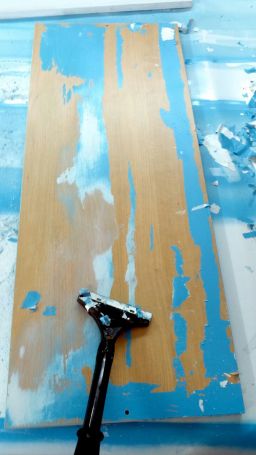
Scraping paint off the bookcase boards.The next step was to use a scraper to remove the paint.  I actually found it quite entertaining.  The blade on the scraper was super sharp, I barely had to put any pressure at all to remove big chunks of paint at a time.  Though after doing the fronts and backs of ten boards, my carpal tunnel kicked in and my wrist kinda hated me.

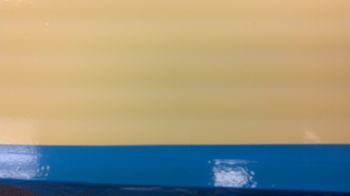
Blue and Yellow Bookshelf Color

I did NOT like this blue and yellow combo. Too primary color looking to me. What do you think?

My next idea was to do a vinyl wrap.  I had already wasted quite a bit of money on primer and paint and invested hours upon hours into this project.  A vinyl wrap would be a good option.  My parents own a sign shop and are nice enough to give me free materials and do work for me at no charge.  I could have had one of the employees wrap my bookcase but I was far too impatient.  Now, let me tell you that if you are not familiar with vinyl do NOT try this on your own.  It will be a lot cheaper just to purchase your own vinyl and do it yourself, but you are going to have bubbles, seams, etc.  I have been around vinyl for the entirety of my life.  Though I’ve never done it professionally, I’ve helped out and taken plenty of odd jobs at the shop.  Despite my experience I still have a ton of bubbles and seams.  From a distance you can’t tell, so it doesn’t bother me much and to an untrained eye it’s not east to spot, but the vinyl wrap I did was far from perfection.  I decided to change up the color scheme and do the shelves yellow.  After wrapping the shelved, I had misjudged the amount of vinyl on the roll and used the entirety of it.  I was a bit concerned that my family might need that pretty canary yellow for jobs, so I then decided to go with the blue with the most left on the roll for the outside of the bookcase.  Big mistake.  At least in my opinion.  The blue and yellow together looked too elementary school.  It was a bad shade of blue.  Defeated, I took the bookcase home and began to assemble it.

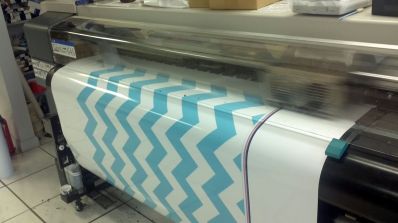
Printer printing bookcase background.

This is the printer used to print the bookcase background.

When I explained my discontent to my parents, who were also going to print me the background for the bookcase, they told me to disassemble it and re-wrap it in a different color.  So I brought it back and changed to a light gray that matched the paleness of the yellow.  I then decided to go with an aqua and white chevron background to tie in the color palette and style to the rest of the room.  The chevron was printed and put on a more rigid plastic than the original backing that the bookcase came with originally.  Which gives the bookcase added strength and support.  It was a lot of work, but I am happy with the outcome.

What do you guys think of the finished product?

Image

Posted in Custom Furniture Pieces | Tagged , , , , , , , , , , , | 1 Comment

Thrifty Find Thursday

image

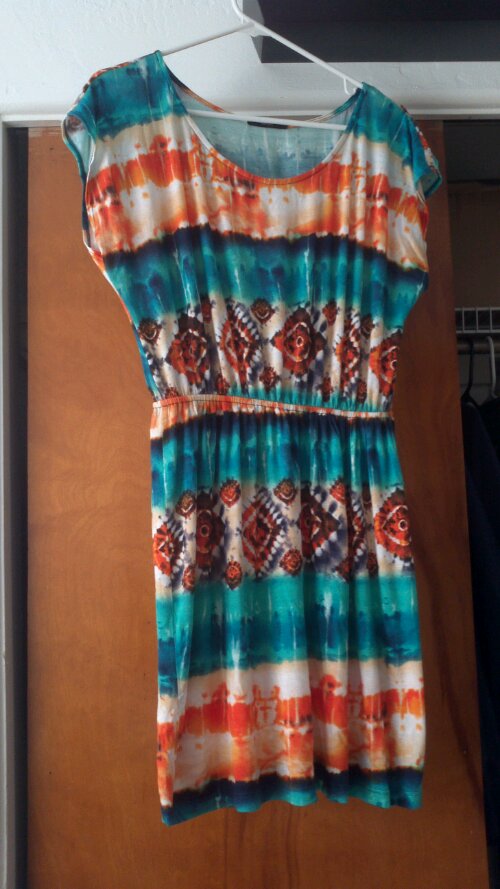
I picked up this Soprano dress from a new thrift store called Two Friends Closet on St. Pete Beach. I got it for $13 and I think it’s really on trend right now. I like to mix it up with different kinds of belts and accessories. It’s super comfy and can be casual or more dressy. I’m kind of in love with it. What do you guys think of it?

Posted in Thrifty Thursday | Tagged , , , , , | Leave a comment

Teal and White Wrapped Kitchen Utensil Holder

Supplies:

  • Glass Vase (Marshall’s) $4.99
  • Teal and White Twine (Dollar Tree) $1

Total: $5.99

Supplies Already on Hand:

  • Hot Glue Gun
  • About 10 glue sticks
  • Scissors

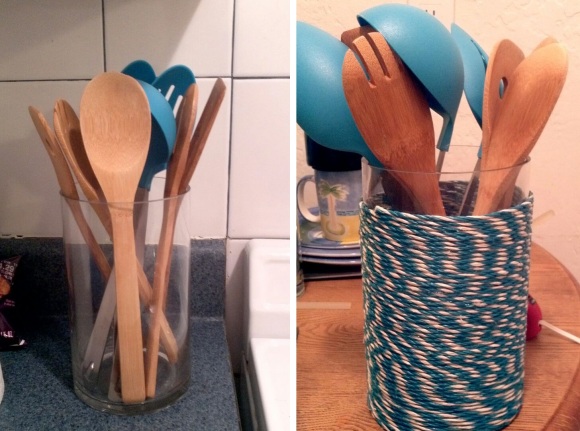
ImageBeing the thrifty (*ahem* cheap, poor) person I am, I bought some cheap utensils from Marshall’s for my kitchen.  The downside was that I had nowhere to put them.  I decided to just grab a cheap vase to stick them in.  On a visit to the dollar store I saw this really cute teal and white twine.  I didn’t know what I was going to do with it, but I figured I’d find some way to use it.  And voila the idea for the wrapped kitchen utensil holder came in.  It was a really simple project and I finished in about 30 minutes or so.

The first wrap was the hardest.  On mine it ended up being a bit uneven.  Then it’s just a matter of gluing and wrapping your way around the vase.  Some tips:  if you care about your table, put something under your glue gun and vase.  Maybe you’re neater than me but I got glue strings and globs all over the place.  Also, if you skip gluing more than about half an inch of vase, the twine won’t lay right.  Another tip is to not lay the glue on too thick.  I thin layer will do.  Too thick and the glue gushes out the side.  It also would have been helpful to have had a lighter on hand to burn the ends of the twine.  I just hot glued them together and twisted the glue in with my fingers, which is a bit unpleasant feeling.  I think burning the ends would have worked better.

I ran out of twine by the end and left the top inch or so unwrapped.  For another dollar I could finish it off, but I actually don’t mind the glass left alone at the top.  But what is your honest opinion.  Does it look cool or does it look unfinished?  Please let me know in the comments!

Posted in Home Decor | Tagged , , , , , , , , , | 1 Comment

Crappy to Cute Coffee Table

Supplies:
– Used Coffee Table: $7
– Sanding Sponges: $9
– Spray Paint, Clear Coat and Primer: $11
– Pin Striping and Vinyl Flower: Free!
Total Cost: $27

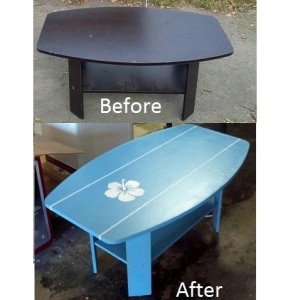
Coffee Table Before and After

I am doing this whole retro/beach theme in my new apartment and I am in love with this surfboard coffee table, however I don’t have $400 lying around to buy it. So when I saw this little black coffee table on Craigslist for $7 I knew I had to have it. Craigslist is my best friend for cheap used stuff.  It was a great shape and the PERFECT size for my tiny living room. It was old, had lots of dings and even had “Nick was here” carved into the wood veneer (thanks a lot Nick!)

Step One: Sanding. I positively hate sand paper, so when I saw these nifty sanding sponges at Home Depot. I decided to give them a try. I bought one course, one medium and one fine grit sponge and they worked wonders. They’re easy to hold and use, get the job done and I’ll get plenty more uses out of them. Sanding the veneer got black dust everywhere, but all those dings and even the carving were easy to sand down. My arm didn’t even get sore.

Step two: Priming Time. I used Rust-Oleum spray primer from Lowes for like $3-4. I took the table in my garage, opened the door and went to town on the table. At the same time I primed an end table I got from a thrift store for $5 that I’m going to use to hold my record player. The can of spray primer was just enough to cover both completely. Now, after priming, my arm was sore. Incredibly sore. I have a carpal tunnel problem that made it worse I’m sure, but my hand was spasming after that.

Step Three: Painting. I could have painted shortly after priming, but work and the flu made me wait a couple of days. At this point I moved the table to my parent’s shop, where I had much more garage space to paint. One can of Krylon Island Splash spray paint was able to do the job (and the top of my end table.) This paint I had to buy at Joann’s. Yes, HAD to. I wouldn’t normally recommend buying paint at Joann’s since it’s so expensive, but no hardware store in the area carries that color. Lucky for me, I have the nifty Joann’s app on my phone and had a 50% coupon, so it only cost $4. Not bad at all.

Step 4: Vinyl. This is where it’s fortunate that my family owns a signs and graphics company. I was able to have the hibiscus flower custom designed and cut for me from vinyl for free. I also got the pinstriping for free, and got to use one of my parent’s employees (who is also a friend) to help me apply them. I am a crafty person, but not at all artistic. My hands are about as steady as an earthquake and I knew I wouldn’t be able to lay the pinstripe straight. So thankfully someone was there to help.

Step 5: Finishing Touch. Since this was going to be my coffee table, I had to protect it. I know on game day people would be setting cold beers and hot food and who knows what else on my table. I would have liked to use a polyurethane or lacquer or some other protective coating, but we weren’t sure how it would react with the vinyl, so I used Krylon’s regular ol’ clear coat to protect it. I sprayed it on and in about 30 minutes, I had a pretty awesomesaucy new table.

Posted in Custom Furniture Pieces | Tagged , , , , , , , , , , , , , , | 6 Comments